
ISO Contours
Reference for GIS plumes

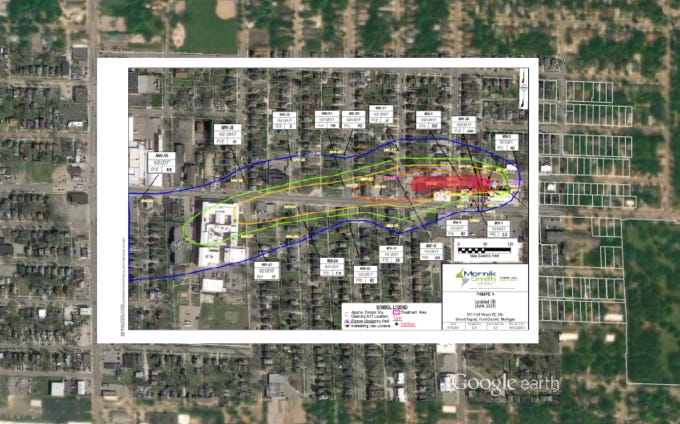
Reference Image:
Usually sent as an adobe file, save the image as a .jpeg in the project drive properly.
Go to the map and create a graphics layer, through the upper tab ensure that the target layer is the new layer. Insert an image into the map, creating a “.jpeg.amx.xlm” file that can now be added as a data file.
Delete the graphics layer and add the new file through the +add data
The image will be placed in the ocean as it has no coordinates attached. Zoom to layer and search for the “Georeferenced” tool. Move the reference image to the site location, click save and exit tool. 1

ISO Contour
Go to the previous iso contours that were created by the GIS peeps.2 Copy and paste to create a new layer
Attribute table in new layer, add new column in +add fields, TYPE_monthyear of new data. Then add rows below with the values of each “contour layer” in the new column. Go to symbology and ensure that each layer corresponds to a value in a row.
Linear refercing tool: Go to modify and match the value to the OBJECTID* row that you want.
Modify Features: select replace geometry. Draw your new polygon.
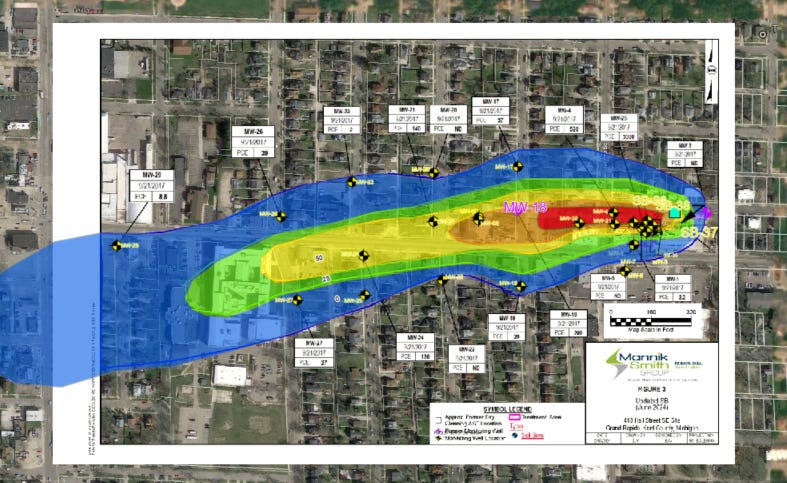
Trace the reference and ensure that the contours layer is ontop of the reference layer.
below is a contour ontop of the reference
SAVE
Go to symbology and ensure that label is correct Units for legend later on.

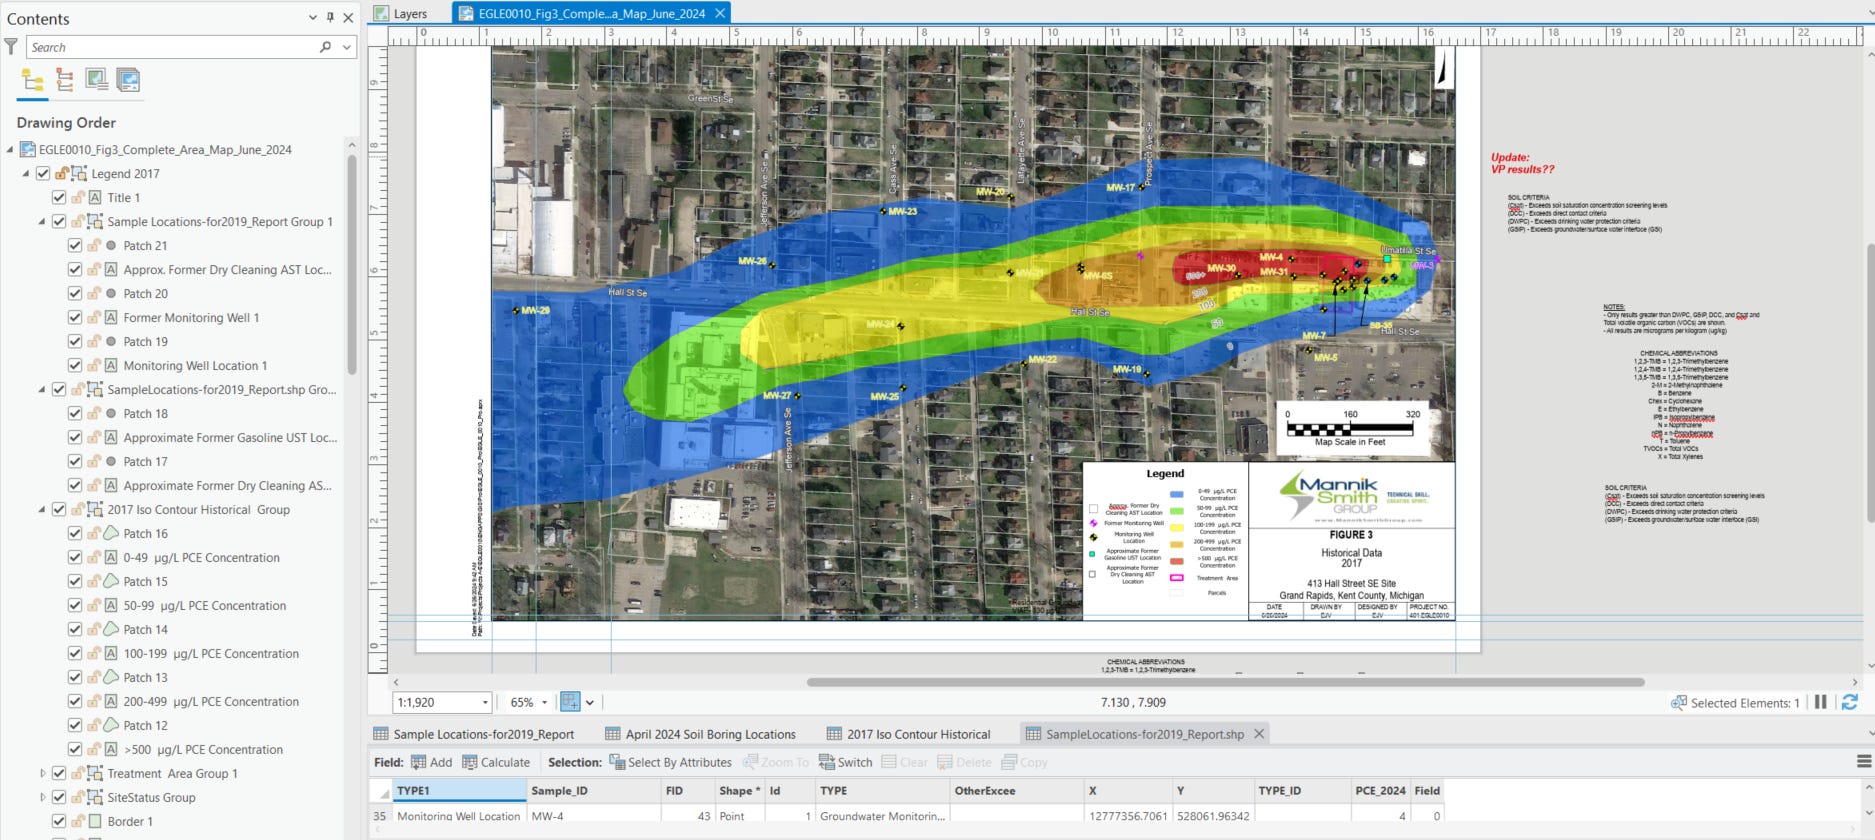
Layout for Report
Fairly simple, it needs a legend with only the important information. Change legend to graphic for easier edits. Update all the information on the labels and ensure all layers are off that aren’t needed before submitting. 3
Edits will be done once report writer goes over work and narrows down what they want for their figures.
Sometimes the image looks like it won’t show up/ is lost, make sure you save and exit the tool before you redownload the file as it might just be loading still, and saving will process the move.
if need to create layer on own, figure it out you’re smart :)
Always double check work before saving layout to project folder, be professional.